How to remove the ‘Slimline Art Hanging System’ track from the wall?
Moving home and want to take your ‘Slimline Art Hanging System‘ track with you? While it’s definitely possible to remove the track, we generally recommend leaving it in place for the next occupants and purchasing new track for your new space. Why? Well, removing it can be tricky and often leads to wall damage that will need repairing—so in many cases, replacing the track is actually the more economical option.
But, we understand that sometimes the track just needs to come down! Whether you’re rearranging or relocating, here’s the process I’ve found works best when removing the track from the wall.
A Quick Note Before You Begin:
If your track was installed directly into plasterboard using ‘Wall Mates,’ keep in mind that this process might cause some or all of the ‘Wall Mates’ to pull through the plasterboard leaving larger holes behind. Unfortunately, this is usually unavoidable. However, if your track was anchored into studs, masonry or a brick wall, the following steps should work smoothly.
Step-by-Step Guide to Removing the Slimline Art Hanging Track:
- Locate the first anchor: Start at one end of the track. To find the nearest anchor, either peek underneath the track or gently run a fine paperclip along the back of the track.
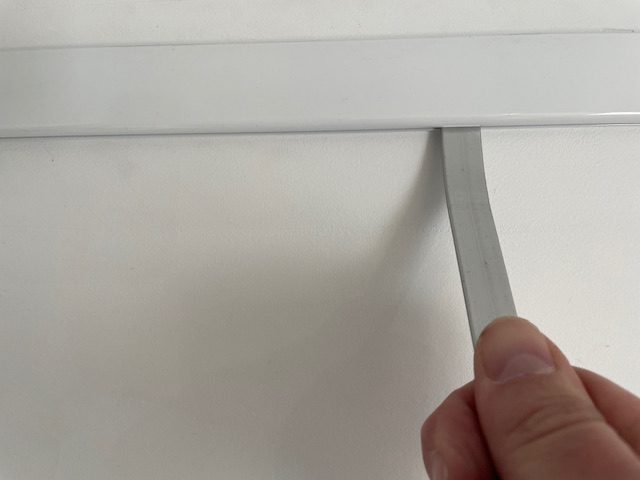
- Pry the track from the anchor: Find something soft (that won’t damage the track) to pry the track off the anchor. I personally use a 14mm wide x 2mm deep section of aluminum bar that I picked up from the hardware store which I insert into the channel of the track on top of an anchor location. While it might bend, it’s gentle on the track’s fascia and gets the job done without causing damage. A flat head screw driver could be used but will cause damage, so it is best to look around and see what you can find. Work gently and take your time, this is not a fast process.
- Work along the track: Once you’ve unclipped the first anchor, continue along the track, unclipping it from each anchor in sequence.
- Slide the track off: When there’s only one or two anchors left holding the track, you may be able to slide the entire track off those remaining anchors.
- Remove the anchors: With the track down, you just need to unscrew and remove the anchors from the wall.
The process is a bit tricky, so take your time and work methodically. 🙂
Good luck,
Ed Banks
Shakespeare Solutions.